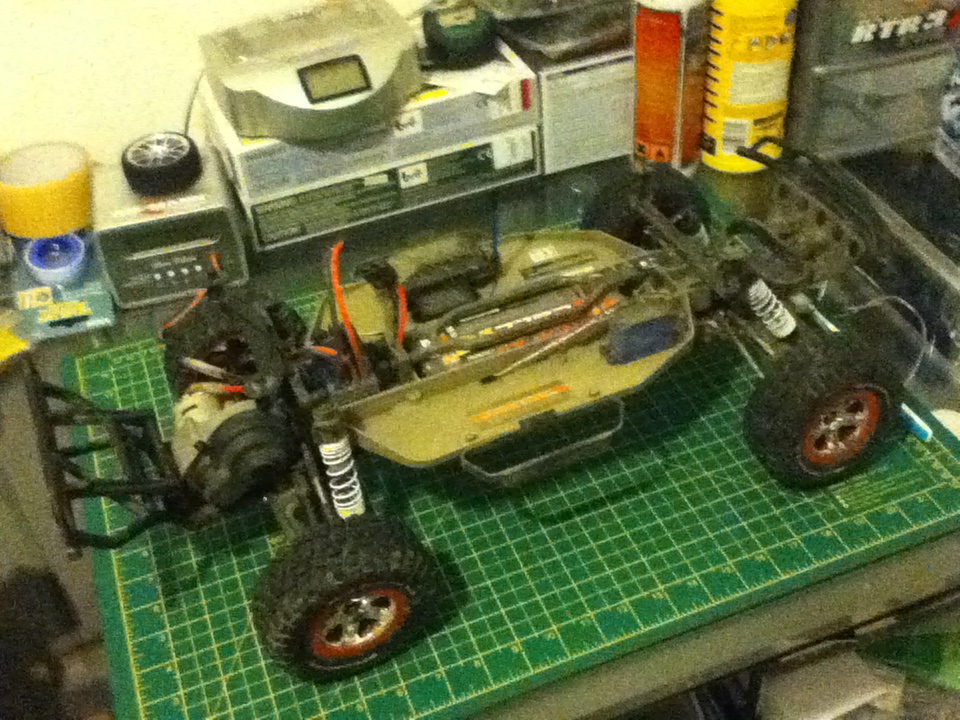
Ok so having built the shocks it was time to start the chassis work. The most major part of this is chopping the front off the main chassis plate. So it was off with the front end.
Having only one internet picture to go by it was a bit of guess work exactly where I had to make the cut. I marked a rough line where I thought I should be aiming for...
...and then deployed the dremel...
The front mounting screws are no longer needed as the bumper now mounts onto the plastic kick up skid plate giving a much greater ground clearance and also allowing the car to bounce up and over rough terrain rather than grinding to a halt.
It turned out that I took a couple of mm too much off... oops! Nothing major though and it won't cause any issues with the running of the car.
I still needed to give it a smooth off and attempt to round off the corners.
To say this wasn't my neatest work would be an understatement. Still so far all cock ups have been cosmetic annoyances rather than anything that will effect the running of the car once complete so I won't beat myself up too much... yet!
That was it for tonight. I hit a problem when trying to take apart the front suspension... and by problem I mean I couldn't work out how to get the pins out! They are threaded on one end and just a round plastic cap on the other. Rather than mess up yet another thing tonight I decided to call it a night and get the instruction manual out for another day.
Monday, 28 February 2011
Nitro low fuel warning experiment!
One of the things that bugs me slightly with my nitro cars is the very limited warning you get when they are about to run out of fuel. As it starts to suck air into the tank you get the surge of power as it runs lean but that only gives you a few seconds to point it back in your direction and come off the throttle before the fuel is used up completely.
What I want is some way of knowing 30 seconds or so before the tank is dry to give me time to bring the car fully back to where I am standing or give me the option of a quick splash and dash with the fuel while the engine is still running.
For my work I have used some simple PIC circuits to monitor the levels of liquids and so I thought... why not try one in my RC car!
Previously I have been using the circuits to monitor water levels using two probes. For this application the system would be looking for a small current flow between the probes. The probes themselves will be positioned with one touching the bottom of the tank, the other around 5mm from the bottom. The idea being that once the fuel drops below this 5mm level the current flow will be lost and the circuit will flash some LEDs and sound a buzzer. All well and good in theory but will it work?
To find out I setup a simple test circuit using an 18-pin PIC circuit board. I don't need all of the functions of the 18-pin but decided that I wanted as many LEDs flashing as possible for the test.
Here is the board I used-
What I want is some way of knowing 30 seconds or so before the tank is dry to give me time to bring the car fully back to where I am standing or give me the option of a quick splash and dash with the fuel while the engine is still running.
For my work I have used some simple PIC circuits to monitor the levels of liquids and so I thought... why not try one in my RC car!
Previously I have been using the circuits to monitor water levels using two probes. For this application the system would be looking for a small current flow between the probes. The probes themselves will be positioned with one touching the bottom of the tank, the other around 5mm from the bottom. The idea being that once the fuel drops below this 5mm level the current flow will be lost and the circuit will flash some LEDs and sound a buzzer. All well and good in theory but will it work?
To find out I setup a simple test circuit using an 18-pin PIC circuit board. I don't need all of the functions of the 18-pin but decided that I wanted as many LEDs flashing as possible for the test.
Here is the board I used-
and here it is populated with the test components...
I still need to add on a suitable power source, which currently I'm thinking will be a 3 cell AAA NiMh pack or 2 cell lithium, and the probes themselves which for the purpose of the test will simply be 2 lengths of wire with the ends stripped bare.
I'll run the circuit as it is simply placed in either my RS4 or Hyper 12 and if it works I'll look at making it a more permanent solution with a case and off board LEDs, maybe even integrate them into the shell in some way. What I would like to do with the RS4 eventually is add some rally spot lights which are illuminated but then flash when the fuel level drops.
Anyway, lets see if it works first!
Tuesday, 22 February 2011
RS4 Rally Conversion: Build Session 1
Some time last week the second pair of rally springs turned up which meant that I had all the parts I needed to start my RS4 rally conversion project, well... apart from a set of wheels to mount my rally block tyres on but that is a minor detail! Here are the pieces I'll be using-
The chassis will need modifying before I can fit the front and rear suspension bits so I thought I'd start with the more straight forward task of putting the shocks together.
Even a pair of shocks has a fair few components though...
Not all of these are needed and as long as you are methodical about putting them together they aren't too tricky. After about an hour all four were assembled.
Next job... modifying the front of the chassis and assembling the front end.
The chassis will need modifying before I can fit the front and rear suspension bits so I thought I'd start with the more straight forward task of putting the shocks together.
Even a pair of shocks has a fair few components though...
Not all of these are needed and as long as you are methodical about putting them together they aren't too tricky. After about an hour all four were assembled.
Next job... modifying the front of the chassis and assembling the front end.
Friday, 4 February 2011
Proline upgraded rear shock tower for the Slash
A few days ago my replacement shock tower arrived.
My concerns were unfounded and it was a rear shock tower as the stated it would be... Modelsport, you need to update your photos!
First impressions are that it looks a lot chunkier and more durable than the stock Traxxas item. The weak point where my previous two broken certainly won't be an issue as the load is spread in a different way.
Here it is on the truck.
My concerns were unfounded and it was a rear shock tower as the stated it would be... Modelsport, you need to update your photos!
First impressions are that it looks a lot chunkier and more durable than the stock Traxxas item. The weak point where my previous two broken certainly won't be an issue as the load is spread in a different way.
Here it is on the truck.
Hopefully I'll get a chance over the weekend to test it out!
Micro drifter lighting project
While waiting for my JConcepts Overtray to dry after painting (more on that once it is fitted!) I started to play about with my cheap micro drift car. Here it is in all its glory.
It looks quite cool but in reality it is a bit crap! Anyway, crap or not it does have clear light lenses which got me thinking... wouldn't it be good if I stuck some LEDs in there.
So I stuck a torch under the front to get an idea of how it might look.
I think that will work quite nicely! I've got some other things on the go but watch this space!
It looks quite cool but in reality it is a bit crap! Anyway, crap or not it does have clear light lenses which got me thinking... wouldn't it be good if I stuck some LEDs in there.
So I stuck a torch under the front to get an idea of how it might look.
I think that will work quite nicely! I've got some other things on the go but watch this space!
Sunday, 30 January 2011
Another Slash bash, another broken rear shock tower!
Yeah, thats right, I broke it again! Not only that but at the same place (dirt BMX track in Wymondham), in the same way (rear shock tower snapped clean in half at the bottom) and at about the same point (3/4 of the way through my first battery of the day)!
I would have upgraded it last time round but Modelsport didn't have any in stock and at less than £4 I thought I'd risk another standard one. Not this time though! Having checked Modelsport both the Pro Line and my prefered RPM option were both out of stock. So I hit ebay and the only thing I could find from a single seller was a Pro Line one so that decision was made for me!
To be honest I have no grounding as to why I would want RPM over Pro Line so I will try and keep an open mind. If it lasts a whole session then it is already doing better than the Traxxas effort!
Only concern is that the picture on the Modelsport website is completely different. In fact it shows this as being the front shock tower. Checking the hole positions though I can't see how that can be the case. Anyway, hopefully it will be the right one... if not I've just picked up a spare for the front!
I would have upgraded it last time round but Modelsport didn't have any in stock and at less than £4 I thought I'd risk another standard one. Not this time though! Having checked Modelsport both the Pro Line and my prefered RPM option were both out of stock. So I hit ebay and the only thing I could find from a single seller was a Pro Line one so that decision was made for me!
To be honest I have no grounding as to why I would want RPM over Pro Line so I will try and keep an open mind. If it lasts a whole session then it is already doing better than the Traxxas effort!
Only concern is that the picture on the Modelsport website is completely different. In fact it shows this as being the front shock tower. Checking the hole positions though I can't see how that can be the case. Anyway, hopefully it will be the right one... if not I've just picked up a spare for the front!
Tuesday, 25 January 2011
Slash diff replacement
Also in the post today was the new diff for the slash.
Much faffing about and some seriously greasy fingers later the diff was assembled.
Diff assembled it was time to put the rest of the transmission back together.
One design feature that I was less than impressed with was the piece of tape that covered over the bottom of the transmission. I have no idea why Traxxas chose to do it and once removed you need to find something to replace it with.
I bought some waterproof repair tape (the stuff you can fix broken car lights with) from B&Q which hopefully will do the job.
...and a quick trim later...
Hopefully it will last!
Transmission complete I started on the re assembly of the car.
It actually went back together pretty easily and after I remembered that I'd used the new screws that came in the pack when assembling the diff I had no screws left over either... can't be bad!
Here it is back in one piece!
Hopefully I can have a proper run with it now... PLEASE!
Much faffing about and some seriously greasy fingers later the diff was assembled.
Diff assembled it was time to put the rest of the transmission back together.
One design feature that I was less than impressed with was the piece of tape that covered over the bottom of the transmission. I have no idea why Traxxas chose to do it and once removed you need to find something to replace it with.
I bought some waterproof repair tape (the stuff you can fix broken car lights with) from B&Q which hopefully will do the job.
...and a quick trim later...
Hopefully it will last!
Transmission complete I started on the re assembly of the car.
| getting there... |
Here it is back in one piece!
Hopefully I can have a proper run with it now... PLEASE!
Wheely good news... wheely bad news!
While clearing out my car (1:1 scale!) to go in for some work I was digging a couple of months of receipts and pastry wrappers out from under my passenger seat and I found my missing HPI wheel!
But karma being a strange beast my ying was soon followed by its yang!
My new rally block wheels turned up today and while they are 1/10 scale I'm not convinced they are 1/10 on road size! Here is a pic for comparison with today's find.
Oh well, they will be perfect for the Hyper 12 when the current off road tyres wear down!
It does mean that I either need to buy some more wheels with tyres or just a set of wheels for the rally block tyres I ordered earlier in the week.
But karma being a strange beast my ying was soon followed by its yang!
My new rally block wheels turned up today and while they are 1/10 scale I'm not convinced they are 1/10 on road size! Here is a pic for comparison with today's find.
Oh well, they will be perfect for the Hyper 12 when the current off road tyres wear down!
It does mean that I either need to buy some more wheels with tyres or just a set of wheels for the rally block tyres I ordered earlier in the week.
Friday, 21 January 2011
Slash grinds to a halt...
Hopeful of a run at some point this weekend I headed out (in the dark!) to run down the batteries from the last run nearly two weeks ago when the shock tower snapped cutting my run short and leaving me with 1 1/2 batteries charged.
I was running on flat wet tarmac with a few tame jumps (and admittedly a few doughnuts!) thrown in. I finished off the first battery and was about half way through the second when it started to make a horrible grinding noise followed by a complete lack of drive.
Slightly miffed and expecting a dodgy slipper clutch to be the issue I packed up and headed home.
Here is the issue:
So it was off with the transmission cover.
Everything looked in order so I tried to adjust the slipper clutch but the whole shaft rotated even though the wheels didn't... odd...
So the only option was to take the whole transmission out and have a look from the other side. Everything at the back had to come off.
So, I had a look...
...and found two rounded off gears and diff oil that was full of shards of metal. The diff had basically gone into self destruct. Not bad for less than an hour running...
So in less than an hour I've destroyed the diff and snapped a shock tower. I thought these trucks were meant to be tough?! Oh well, replacement diff has been ordered so I can get some running out of this truck before I lose interest in the thing completely and I'll fight it out over a warranty claim in due course.
I was running on flat wet tarmac with a few tame jumps (and admittedly a few doughnuts!) thrown in. I finished off the first battery and was about half way through the second when it started to make a horrible grinding noise followed by a complete lack of drive.
Slightly miffed and expecting a dodgy slipper clutch to be the issue I packed up and headed home.
Here is the issue:
So it was off with the transmission cover.
Everything looked in order so I tried to adjust the slipper clutch but the whole shaft rotated even though the wheels didn't... odd...
So the only option was to take the whole transmission out and have a look from the other side. Everything at the back had to come off.
But after a while the transmission was out.
To summarise slightly (unlike me I know!) after much faffing about I found that I could rotate the input shaft to the transmission without either wheel spinning. Spinning the wheels also felt very 'crunchy' which could only mean one thing... the differential.So, I had a look...
...and found two rounded off gears and diff oil that was full of shards of metal. The diff had basically gone into self destruct. Not bad for less than an hour running...
So in less than an hour I've destroyed the diff and snapped a shock tower. I thought these trucks were meant to be tough?! Oh well, replacement diff has been ordered so I can get some running out of this truck before I lose interest in the thing completely and I'll fight it out over a warranty claim in due course.
Tuesday, 18 January 2011
RS4 - Little bit of prep work
In order to save a bit of cash on the rally conversion I decided to dig out my old RS4 Impreza shell from the garage.
After a quick wipe with the quick detailer it was looking pretty good!
It won't be much of a rally car if I can't get 4 matching wheels on, luckily my replacement alloy hubs turned up today.
I'm not a huge fan of alloy hubs but as usual it was cheaper to get alloy ones from Hong Kong than to get plastic ones from the UK... THE WORLD HAS GONE MAD!
Here they are adding a bit of bling to the RS4...
Finally I threw the Impreza shell on with the vintage wheels for a laugh expecting it to look a complete joke.
Funny thing is I think it kind of works in an odd way! Maybe I'm just trying to convince myself that so I don't have to buy any more on road wheels! Take a look...
I'll order up some rally block tyres and new wheels for the loose stuff and make do with these for a bit for tarmac.
The rest of the bits were ordered tonight but Paypal is playing up so I'll have to wait until tomorrow to see if the payments went through or not.
Subscribe to:
Posts (Atom)